前言
在windows下想使用yolov3, 需要先编译darknet
本文的编译过程主要参考AlexeyAB大神的编译过程, 对应的是legacy way
https://github.com/AlexeyAB/darknet#how-to-compile-on-windows-legacy-way
关于using vcpkg方法
至于using vcpkg这个方法没成功, 原因有两点
- vs2017 疯狂报错, 报各种
intptr_t等错误(尝试过改为 平台工具集改为v140、编译设置为c++, 均失败告终) - 没太理解图中这两点, 一是要修改
CMakeLists.txt的内容, 查看内容后, 可能只是为了有tensor core显卡做准备的吧, 而是bulid.ps1报了好多错误…emmmm, 枉费我编译了2.7个小时的opencv(vcpkg下载opencv之后, 竟然疯狂build…)
legacy way编译
首先, 我们看看GPU版本需要下载什么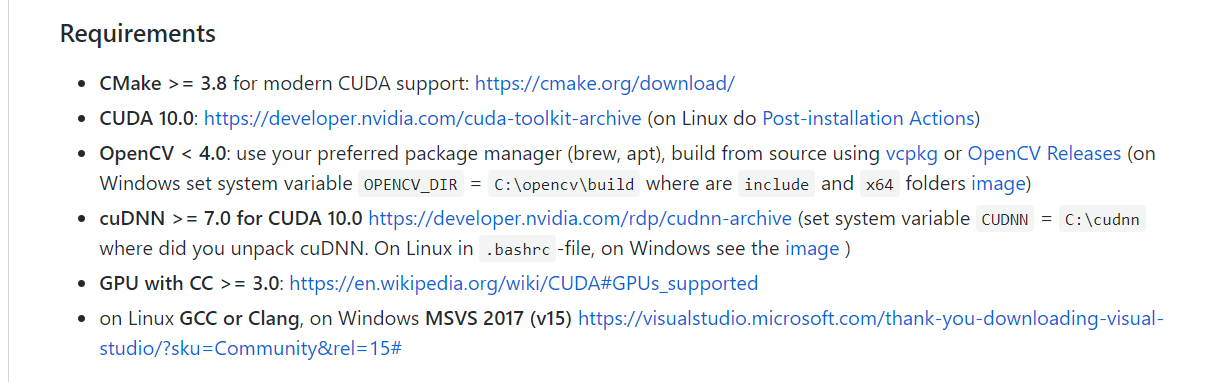
需要安装的有
- vs2015, 本文介绍使用vs2015编译darknet
- CUDA 10.0: https://developer.nvidia.com/cuda-toolkit-archive
- OpenCV < 4.0 https://opencv.org/releases.html, 环境变量暂时不设置, 稍后介绍
- cuDNN >= 7.0 for CUDA 10.0 https://developer.nvidia.com/rdp/cudnn-archive, 环境变量暂时不设置, 稍后介绍
别的就不需要安装了
安装CUDA 10.0和cuDNN7.4
安装和配置过程参考文章 https://vonsdite.cn/posts/c6b151e6.html
另外, 新建一个系统变量CUDNN, 变量值为cudnn的安装路径: C:\Program Files\NVIDIA GPU Computing Toolkit\CUDA\v10.0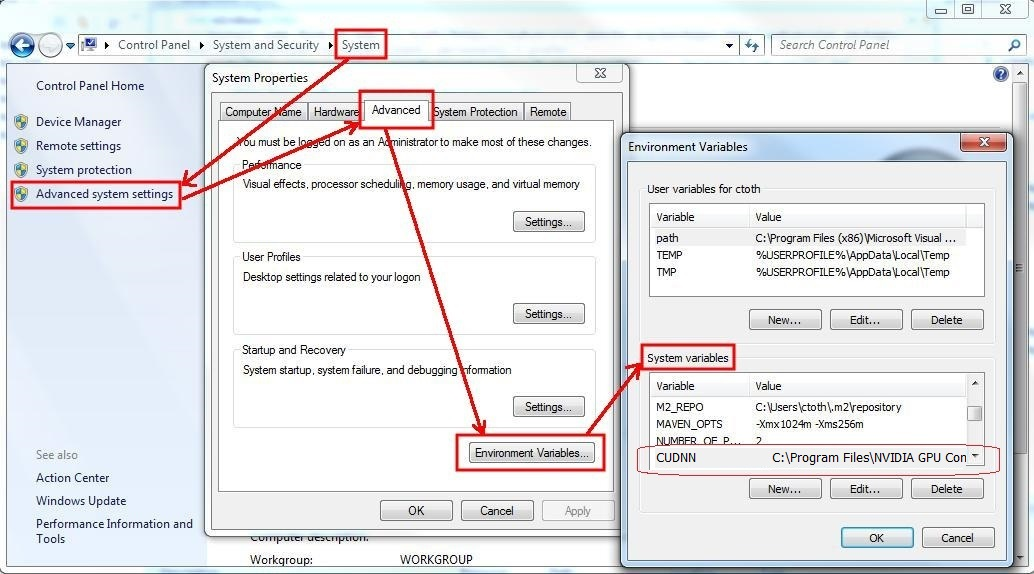
OpenCV安装
openCV安装和配置过程参考文章 https://vonsdite.cn/posts/f13d7151.html
编译darknet
clone项目
首先clone AlexeyAB的仓库
1 | git clone https://github.com/AlexeyAB/darknet.git |
编译
用vs2015打开 你clone的目录\darknet\build\darknet\darknet.sln
设置
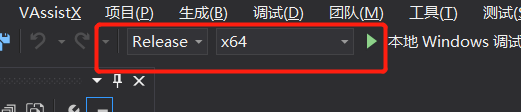
- 解决方案配置为:
Release- 解决方案平台为:
x64
修改项目属性: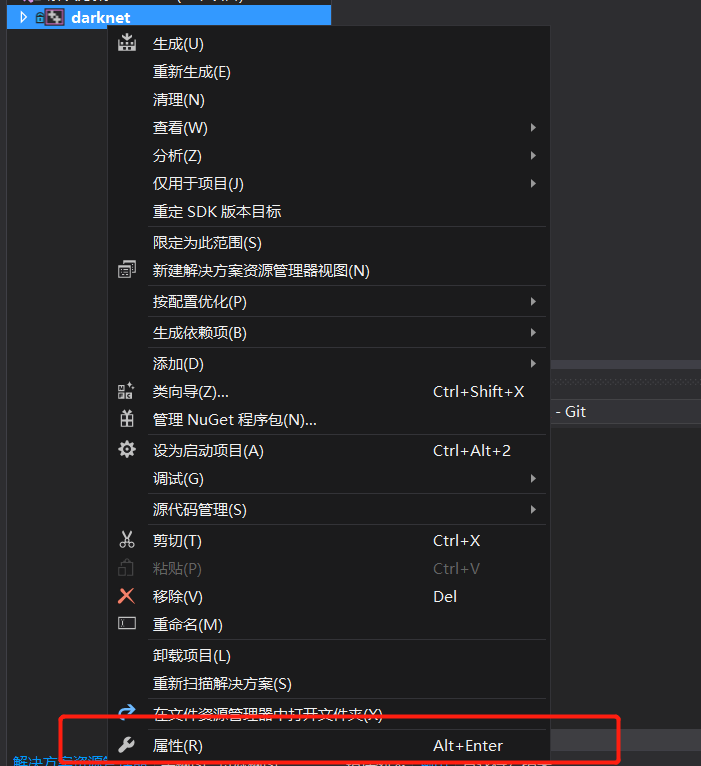
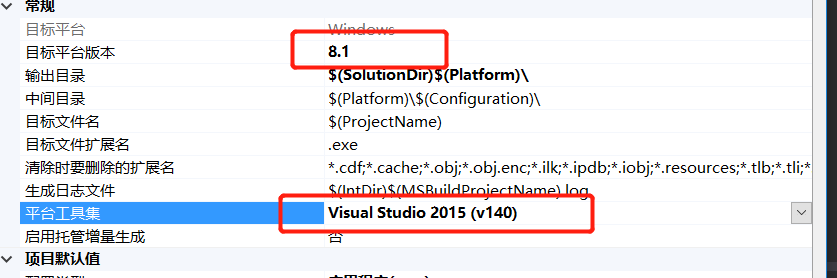
属性=>常规, 目标平台版本为8.1, 平台工具集为v140
C\C++=>常规=>附加包含目录, 将项目自带的opencv包含目录改成自己安装的opencv包含目录
C:\opencv\build\include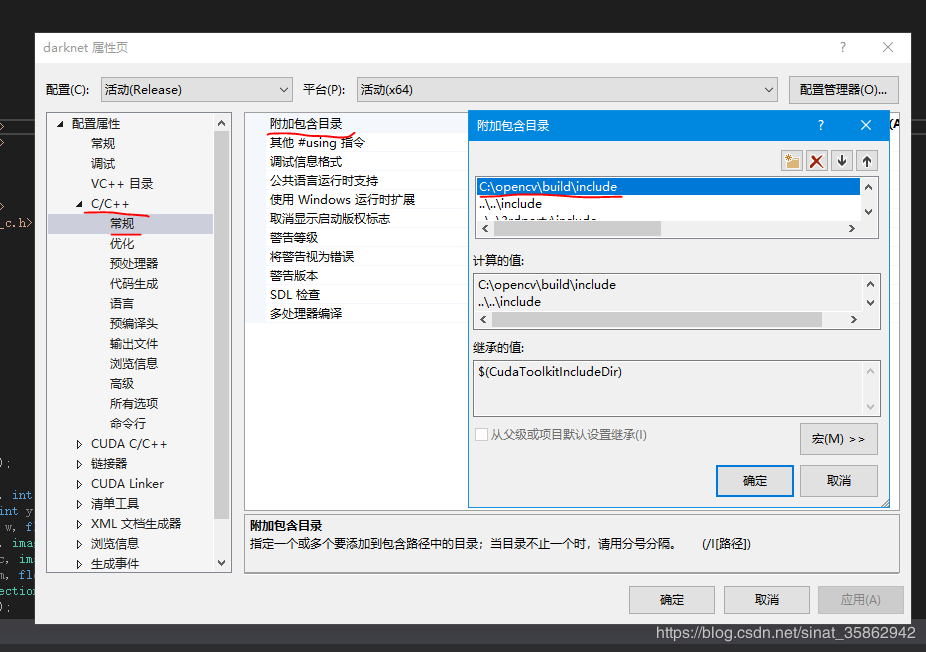
属性=>链接器=>常规=>附加库目录, 将项目自带的opencv库目录改为自己安装的opencv库目录
C:\opencv\build\x64\vc14\lib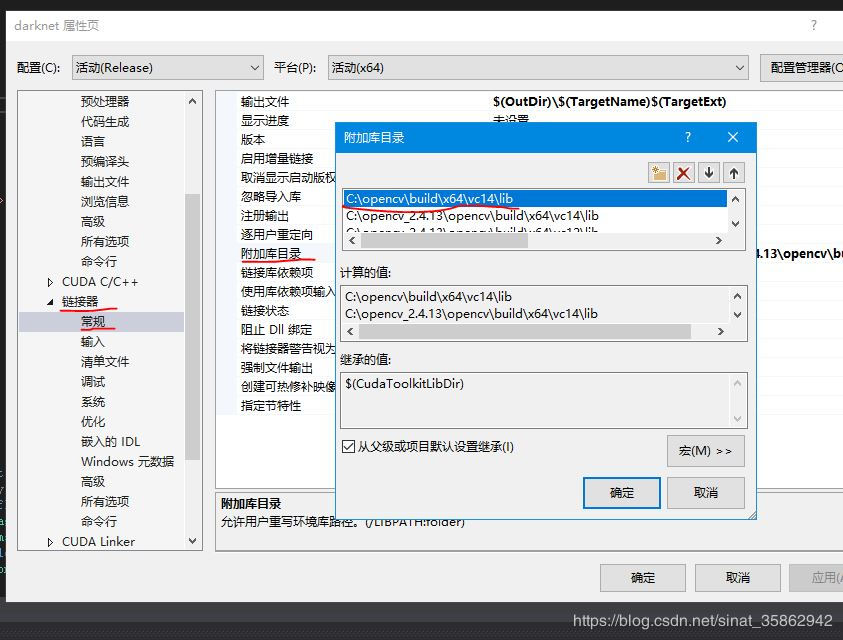
保存更改的属性, 生成=>生成darknet。编译成功, 在你clone的目录\darknet\build\darknet\x64下会生成darknet.exe
- 将
C:\opencv\build\x64\vc14\bin下的opencv_world345.dll和opencv_ffmpeg345_64.dll复制到darknet.exe所在文件夹下- 将
C:\Program Files\NVIDIA GPU Computing Toolkit\CUDA\v10.0\bin下的cudnn64_7.dll也复制到darknet.exe所在文件夹下, 就可以在Windows系统下用darknet框架训练YOLO啦!
可能出现的错误及解决
The CUDA Toolkit v10.0 directory '' does not exist
1 | error : The CUDA Toolkit v10.0 directory '' does not exist. Please verify the CUDA Toolkit is installed properly or define the CudaToolkitDir property to resolve this error. |

出现这个问题的时候, 只要修改项目属性, 配置上正确的CUDA目录即可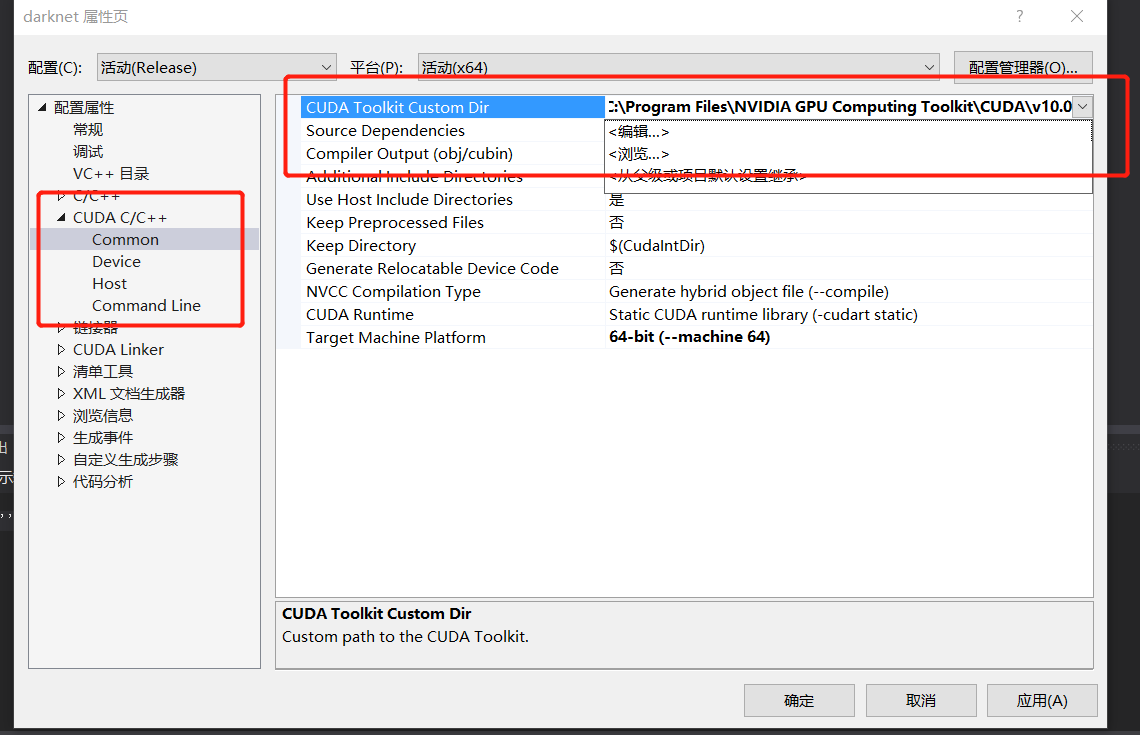
然后重新生成darknet即可
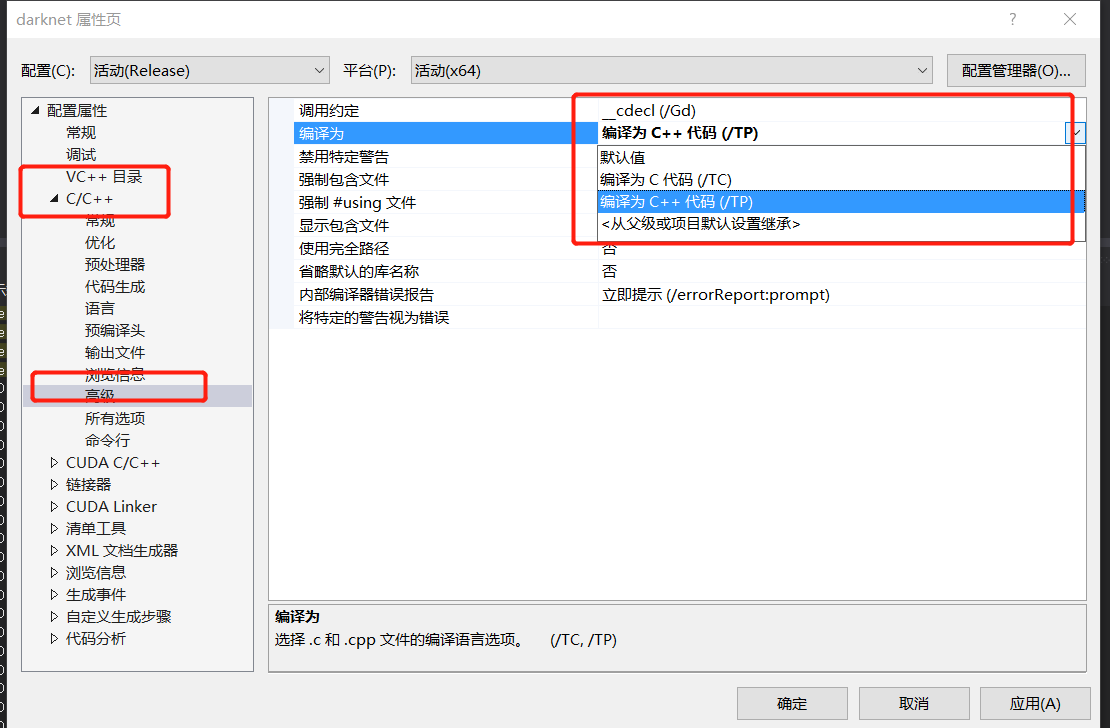
各种语法错误
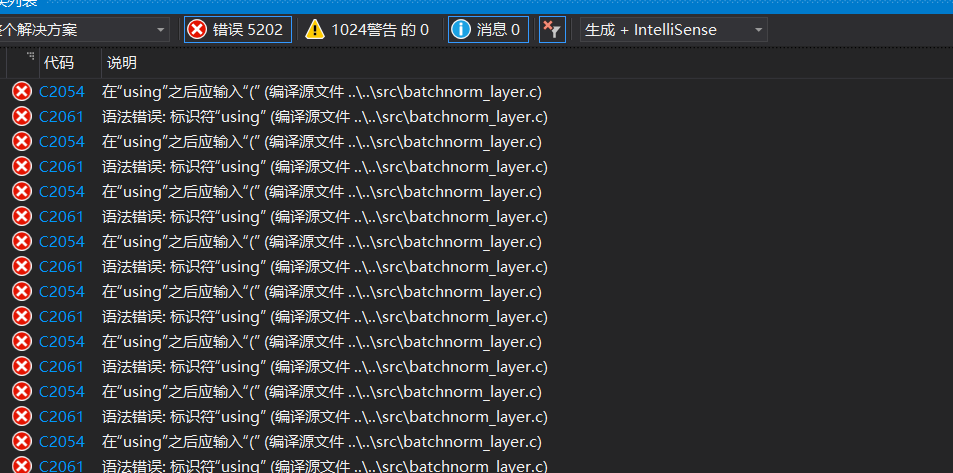
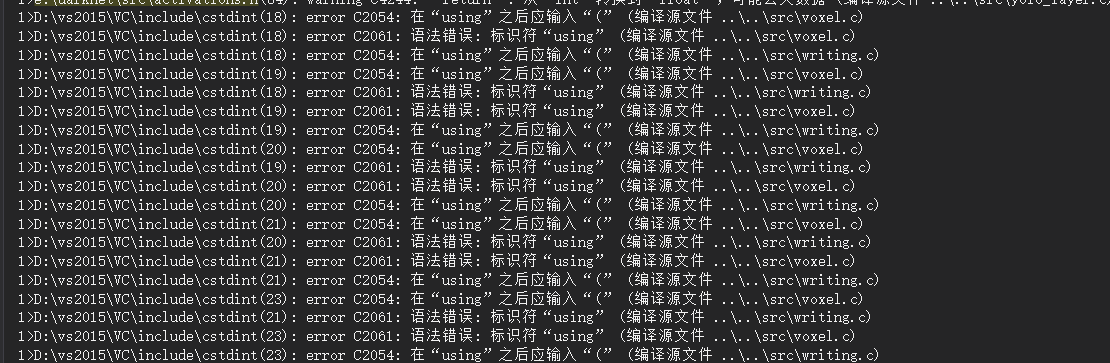
1 | error C2054: 在“using”之后应输入“(” (编译源文件 ..\..\src\voxel.c) |
解决办法, 打开项目属性页=>C/C++=>高级=>修改编译为 为**编译为C++代码(/TP)**即可解决